
If you missed the first 3 parts, you can find them here (part 1: research, part 2: building forms, part 3: pouring concrete). This part contains the un-molding and placing of the counters.
We let the counters cure for about a week. They still weren't at maximum strength (they'll continue to get harder over the next few weeks), but they were plenty solid enough to move.


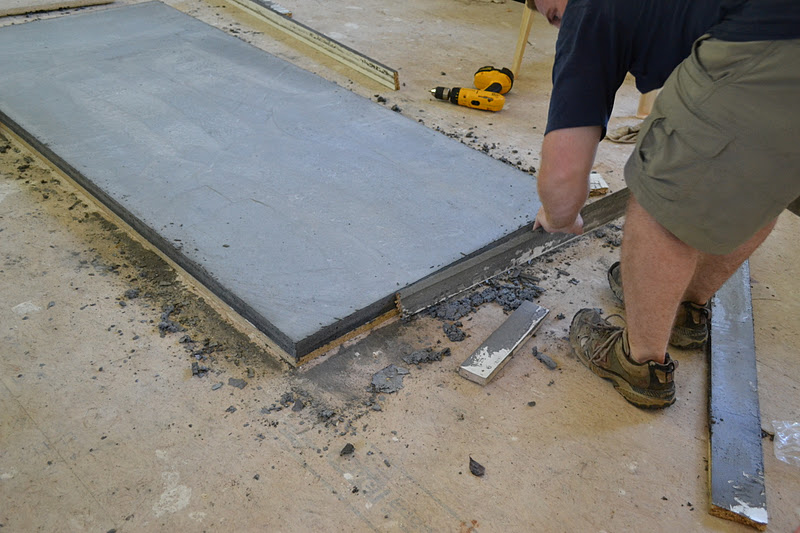
Matt unscrewed the sides of the forms and pried them off. They didn't just fall off because the seams were caulked, so some of the sides broke when we pulled on them. We also noticed how, even though we caulked the edges, the water from the concrete still seeped into the melamine boards causing the particle board inside to expand a little.
If you remember in part 3, I explained how this is a cast mold, so we will be flipping them over and the bottoms will become the top of our counters.
Once the sides were off, we weren't sure how easy the concrete would release from the bottom board. So Matt pushed on it.

Wow. They just slid off. Well...not super easy. I mean it IS hundreds of pounds. But the slick surface of the melamine worked great!
Together, just the two of us, we picked up one edge to peak at how they looked. This scared the begeezes out of me. 1- I didn't want to drop it and watch it break on the floor and 2- I didn't want to drop it and break my foot or crush my fingers. I don't think I actually supported much weight. Just took the edge off of what Matt had to lift. Lowering them down was much scarier then lifting up.

There she is!!
Still a long way from finished. If you'll notice on the white board in that photo above, you can see the caulk seam across the middle. The boards didn't come in large enough pieces, so we have to screw/caulk two together. Since the water could still seep into the cracks, it made the particle board expand (aka get puffy), and made the crack even bigger.

Causing this as a result.

It looks like two pieces of concrete glued together. We call it our faux seam.
And now for the other piece (the sink side).


I'm actually really glad the edges are full of holes. I really wanted the rustic industrial look. Not the highly polish modern look.
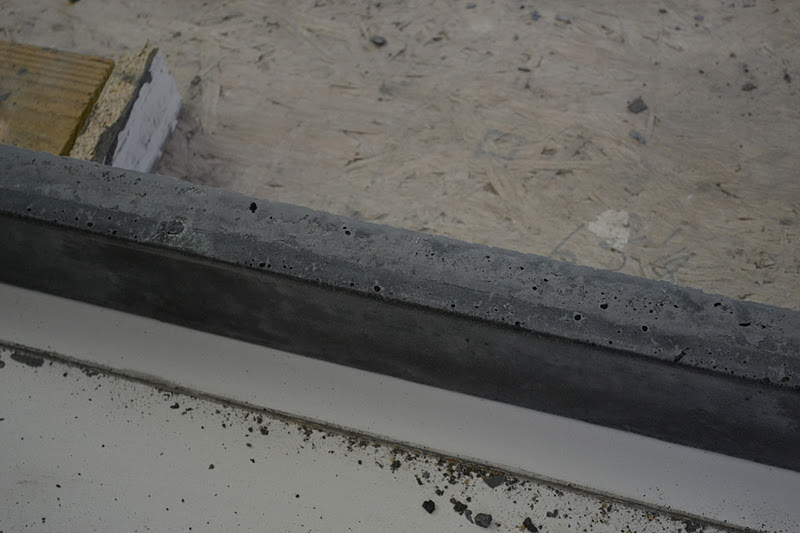
We were very pleased with the fact that there weren't many holes anywhere. Until we got to this spot and saw lots of holes. The weird looking one is dry concrete mix. We think it was caused by a piece of a tree leaf that was in the concrete mixer and it prevented the concrete from getting mixed properly. It looks smeared because I had already rubbed it with my finger and spread dust around.

Moving these counters into place was not going to be an easy task. They are so so heavy. Matt was going to call two friends to help, but I insisted he call 3. I'm so thankful we have friends who will drive across town to pick up heavy stuff for us in exchange for a meal!
I couldn't be there, but someone was there to take pictures for me. Pardon the dusk particles in the air. The flash got turned on and they didn't know how to turn it off. But I'm so glad I got to see these pictures since I wasn't there!


In real-time, the counters are finally finished (as of Oct. 8th), but in this photo they are still about 3 weeks, and lots of frustration, from being finished. I've never had a post take 5 parts to tell, but I don't think Blogger supports that many photos in one post, and I don't have the patience to sit and upload photos and add narrative for that long in one sitting.
Continue reading:
Part 1
Part 2
Part 3
Part 5
No comments:
Post a Comment