
We measured the where the sink hole goes and used painters tape as a guide. The gloves protected my hands because this stuff is sharp!

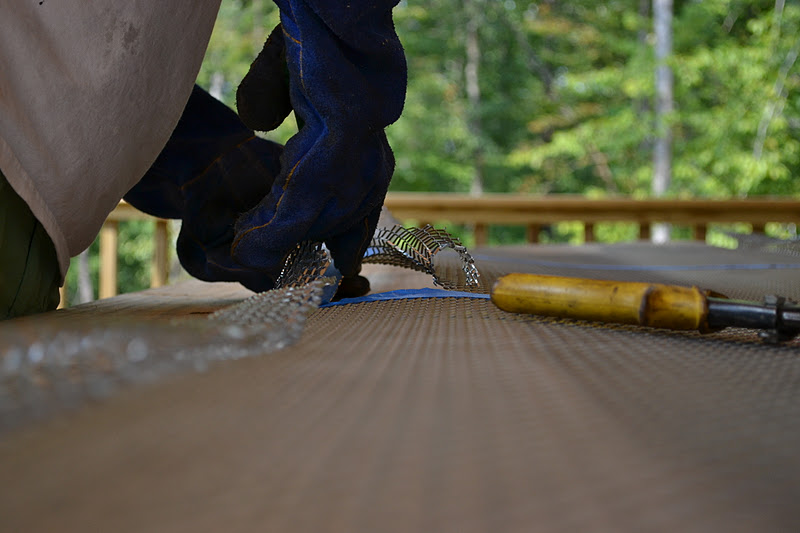
Matt is bending the rebar. This will make more sense later. His tractor implement has some holes that he thread the rebar through in order to give him the leverage to bend the rebar where he wanted.


We're making a rectangle in case you couldn't tell. This piece will lay inside the "bar" countertop.

It was too wide the first time, so he had to make some adjustments.

This wrapped up that afternoon. Making the metal forms took way longer than we thought it would (doesn't it always?).
The next day (or some other day. it's been so long I can't remember), we arrived to find this:

You may have seen this on facebook about 5 weeks ago. That puts this time frame in perspective. Yes, it took me this long to blog about it.

I'm not really a snake person, but this gal/guy is kinda beautiful. Matt's friend, Zach, brought us two black rat snakes to help with our mouse problem. As far as we know, we don't have many snakes native to our land. I know there is at least one black racer, but he needed some help.
Not sure if they aren't doing their job, or they are still strongly out-numbered, but we saw a mouse just a few days ago (on 10/9/11). Lucy chased it, but it hid in Matt's car. No idea if it is still in there. I hope not.
The concrete pigment was mixed at half strength. So instead of one box of pigment for each bag of concrete, we needed HALF a box of pigment for each bag of concrete. Instead of eyeballing it, we used our postal scale (Matt had this for some auto shop work and we also use it has a kitchen scale). Since we were doing many batches, we wanted the color to be consistent.

In it goes into the mixer.

Adding the water.

Our first fresh batch.


We're only filling the forms half way up, then laying in the metal form before adding the rest.


I'm using a hammer/mallet to vibrate the concrete. This helps the air bubbles move to the top and pop. When concrete jiggles, the watery part flows around all the larger pieces of gravel. It's possible to rent a concrete vibrator, but I don't think that we could use it with the counters sitting on the ground. They would have to be placed up on a shop table or something.
So, what the other bloggers did was use an electric sander (without the sanding pads) on the edges to shake the bubbles loose. Another suggestion was to use a mallet or hammer and just keep hitting/tapping the sides. I did both sander and hammer, but found that the hammer seemed to be working better. I whacked that thing thousands of times. Rapidly.
I could see the air bubbles coming to the surface and popping. It was really hard work!


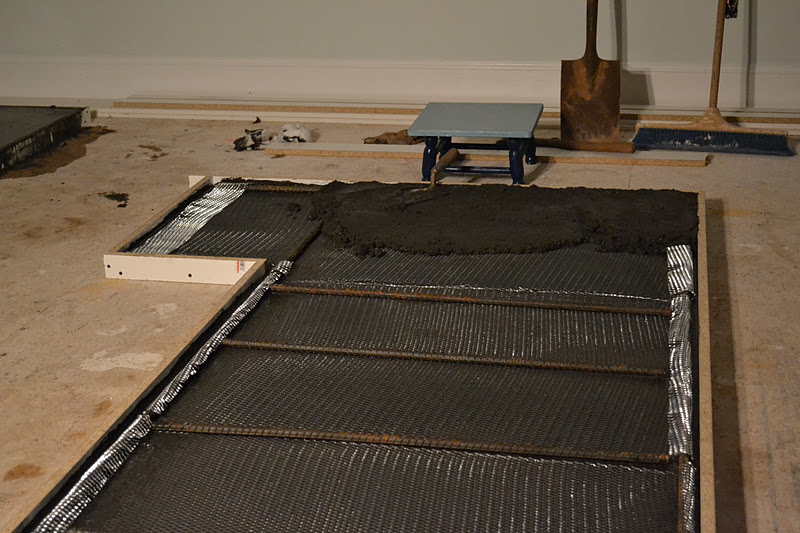
This is called screeding the concrete. You use any flat board and wiggle it across the surface to help level and smooth the concrete. Since this countertop is a cast mold, the side that is on the bottom will be the top of the counter and the surface that you see now will be the underside.

Now all we have left to do is wait for it to cure in about a week.


This one is already starting to set up.

Continue reading:
Part 1
Part 2
Part 4
Part 5
No comments:
Post a Comment