Showing posts with label floors. Show all posts

Saturday, December 10, 2011

We're Floored!

In addition to passing inspections, we also had to get the floor finished before moving in our furniture. I bought the flooring from Ikea back in September (jumped the gun on that one, didn't I?).

It's "click and lock" laminate for around $1 a sq ft (pretty much as cheap as they come). On November 12th we starting installing it (and finished December 3rd).


We got this much done the first night (to the edge of the hallway).


I should add that under the flooring you're supposed to lay these thin sheets of foam. They are for sound dampening and also helps level the floor in case there are any imperfections or bumps under there.

Something I didn't know about "click and lock" flooring: it doesn't "click and lock".

That makes it sound super easy to put together. In reality, this tongue and groove flooring has to be lined up perfectly with the other row, then beat on the long side with a rubber mallet until it seats. Then, beat on the short side to slide it into position. I guess there's a reason they make it super tight. You don't want them shifting or coming out ever again.

This flooring is referred to as a "floating floor" because it doesn't get attached to anything (not nailed down or glued). The shear weight of it keeps it together and secure (more on the weight of it here).

Also, anything made of wood (it's not solid wood, but more like pressed wood with lots of glue) is very susceptible to changes in humidity. In the summer, wood will swell. In the winter, it will dry out and shrink. If we nailed or glued this flooring to the subfloor, and it swelled, we'd end up with wrinkles. Thus the "floating floor". We learned we're supposed to leave at least a 1/4 inch gap along all the baseboards as growing room called the "expansion gap". Then, to hide that gap, we installed quarter-round along all the baseboards.

At the end of the second day, we were here:


Here's a behind the scenes looks at the other half of the room:


That is before it got messy.

We worked our way from the front of the house to the back, doing the living room portion, then the second bedroom, then the hallway (to connect those two rooms), and on from there.


Next, came the real challenging part. What to do with the door jams and trim? So far, we've just been dealing with regular walls and baseboards. If we left a visible expansion gap, we couldn't cover it with quarter-round here because you can't put quarter-round in a door jam (the door couldn't close) and it would look stupid to have quarter-round on door trim.

After doing some research, I learned that we needed to "undercut" the door trim and jam. Either with a hand saw or a special power saw (called a jamb saw) that can get that low to the floor.

Check out this video on youtube that illustrates what I'm talking about.

We tried the hand-saw method (or rather Matt did). It was highly frustrating, so I searched for a jamb saw to buy or rent. No luck there. So, Matt called a contractor friend and asked if he had some kind of saw that would work for this project.

He did. Not a jamb saw, but a multi-tool saw thingamajig that is good for more than just this project. We borrowed his and it worked great (we should probably get our own someday).

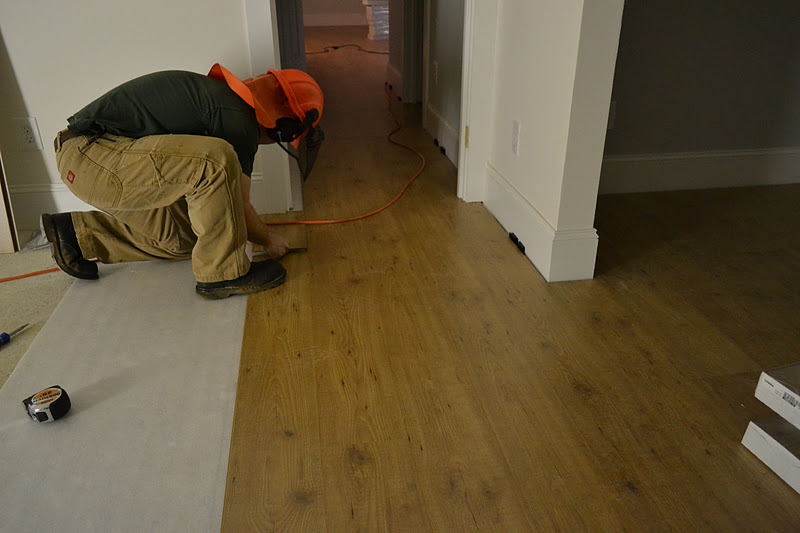
Here is a piece going in to the first jamb.


Perfect fit. Sorry for the poor lighting.

Undercutting the door jamb still lets us have a hidden expansion gap.


That's a florescent light leaning against the door that we were working by. Drop cords everywhere!


All finished!! Beautiful right?


There was saw-dust everywhere!


The quarter-round came pre-primed, but I decided it would be easier to paint it BEFORE it was installed against our pretty new floors. It was outside drying.


We really used twice this much. Now all I have to do is patch the nail holes and do a little touch up paint (later on).

I don't have a picture of the quarter-round installed.

And just keepin' it real, here's an in progress shot of our pretty kitchen counters during this messing project.


Also covered with dust.

Friday, September 30, 2011

IKEA Flooring

When it came to flooring, we would have loved to have been able to afford hardwoods, but that just wasn't going to happen. And it wouldn't have been a good splurge since we aren't going to live in it for years and years (fingers-crossed). And wall-to-wall carpeting was just NOT an option in my book.

This lead us quickly to laminate hardwood. Not the really nice stuff either, which is still $3/sqft. We needed something around $1/sqft. That's hard to come by. Lowes has an aisle of laminate and as you walk down it you pass the $3/sqft (which looks really really good!), then you pass the $2/sqft (starting to look not-real), then you get to the $1/sqft stuff that they hide at the end of the aisle out of embarrassment. By itself, it really didn't look THAT bad (not for $1 anyway). It was fine.

Then, I took Matt to our local IKEA for his first visit (yes, we had a "date" to IKEA, complete with a coupon for a free dinner!). Our goal was to pick out some indoor lighting (mostly kitchen). We also happened to notice the laminate floors they had in their showroom. It was Antique Effect and it was installed in a mock-living room. It looked way better than what Lowes had. And it was still around $1/sqft. I was sold.


I love how the wood image (laminate is a picture of wood printed on to a composite material) is a wide 6 inch plank instead of two 3 inch planks printed on one piece.

We didn't buy it that day. I came back by myself for some crazy reason. It would have taken forever to plan a time when Matt could go back. I had taken measurements of our house and did the math to figure out how many boxes of flooring I needed (28, but I bought two extras just in case). I also took measurements to make sure I could fit them all in my jeep's cargo area with the seats folded down.

I went straight to the IKEA warehouse, by-passing all the showroom stuff. I grabbed a cart and started loaded boxes onto it. Holy crap, these are heavy! The packages aren't even that big. I had my cart and started loaded and quickly realized not only can I not load all 30 by myself, but they won't fit in one cart. And I can't push the cart with that much weight because of the poorly engineered wheel design.

Thankfully, a worker came to help me and loaded the remaining 20 boxes and pushed the heaviest cart to the check out and left me like this:


One cart weighing over 300 lbs, and the other weighing over 600 lbs. I had to pull them along, and tell people to watch out as they rolled to the left and right uncontrollably. Oh, and the rolls of white stuff are foam sheets that go under the flooring to help with leveling and sound absorbing. Our total for flooring was just over $1,000. Sounds like a lot, so I can't even imaging how much a full sized house with hardwoods would be (upwards of $10,000 I would guess).

IKEA has a loading zone, so I didn't have to load them all by myself. But driving my Jeep home made me nervous. Stopping at red lights was interesting. I felt like I was driving a semi. I had to be very careful and really pushed some yellow lights because I just couldn't stop in time without 1000 lbs slamming into my dash and me (that kinda happened once).

Now, they are sitting in our garage waiting until after the subs come back to install everything (lights, faucets, etc.). We are waiting until after they are done to install the floors so they don't get scratched up.

*Update: check out the finished floors here and here*

LinkWithin

Related Posts Plugin for WordPress, Blogger...