Friday, October 14, 2011

Concrete Counters Part 4

We're getting close to the end here. But this is not the final reveal. There is still the final and most important step: sanding/polishing and sealing.

If you missed the first 3 parts, you can find them here (part 1: research, part 2: building forms, part 3: pouring concrete). This part contains the un-molding and placing of the counters.

We let the counters cure for about a week. They still weren't at maximum strength (they'll continue to get harder over the next few weeks), but they were plenty solid enough to move.


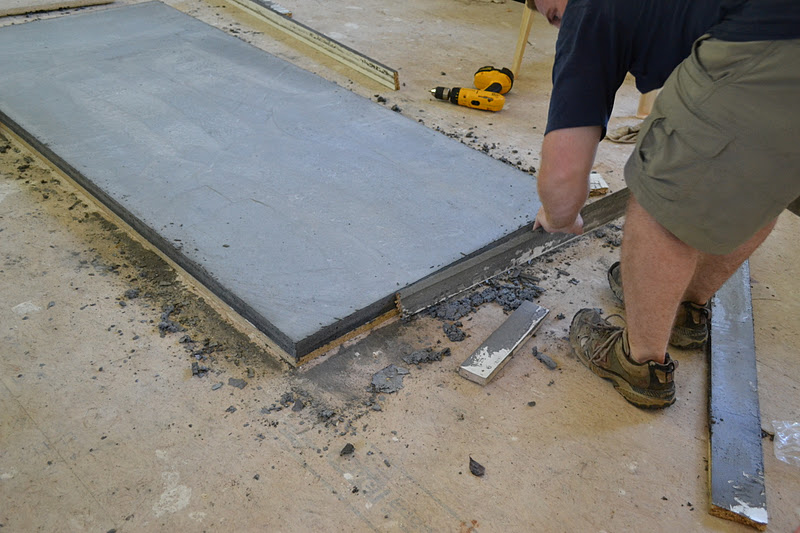


Matt unscrewed the sides of the forms and pried them off. They didn't just fall off because the seams were caulked, so some of the sides broke when we pulled on them. We also noticed how, even though we caulked the edges, the water from the concrete still seeped into the melamine boards causing the particle board inside to expand a little.

If you remember in part 3, I explained how this is a cast mold, so we will be flipping them over and the bottoms will become the top of our counters.

Once the sides were off, we weren't sure how easy the concrete would release from the bottom board. So Matt pushed on it.


Wow. They just slid off. Well...not super easy. I mean it IS hundreds of pounds. But the slick surface of the melamine worked great!

Together, just the two of us, we picked up one edge to peak at how they looked. This scared the begeezes out of me. 1- I didn't want to drop it and watch it break on the floor and 2- I didn't want to drop it and break my foot or crush my fingers. I don't think I actually supported much weight. Just took the edge off of what Matt had to lift. Lowering them down was much scarier then lifting up.


There she is!!

Still a long way from finished. If you'll notice on the white board in that photo above, you can see the caulk seam across the middle. The boards didn't come in large enough pieces, so we have to screw/caulk two together. Since the water could still seep into the cracks, it made the particle board expand (aka get puffy), and made the crack even bigger.


Causing this as a result.


It looks like two pieces of concrete glued together. We call it our faux seam.

And now for the other piece (the sink side).


I'm actually really glad the edges are full of holes. I really wanted the rustic industrial look. Not the highly polish modern look.
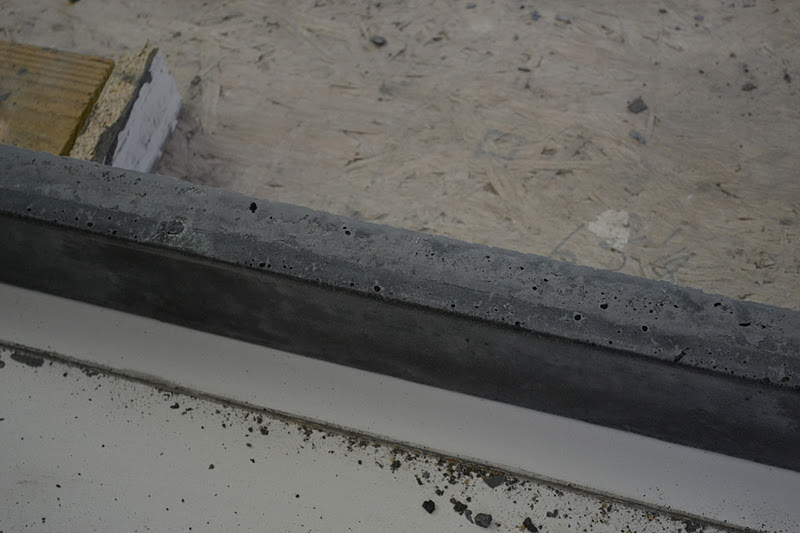


We were very pleased with the fact that there weren't many holes anywhere. Until we got to this spot and saw lots of holes. The weird looking one is dry concrete mix. We think it was caused by a piece of a tree leaf that was in the concrete mixer and it prevented the concrete from getting mixed properly. It looks smeared because I had already rubbed it with my finger and spread dust around.


Moving these counters into place was not going to be an easy task. They are so so heavy. Matt was going to call two friends to help, but I insisted he call 3. I'm so thankful we have friends who will drive across town to pick up heavy stuff for us in exchange for a meal!

I couldn't be there, but someone was there to take pictures for me. Pardon the dusk particles in the air. The flash got turned on and they didn't know how to turn it off. But I'm so glad I got to see these pictures since I wasn't there!


In real-time, the counters are finally finished (as of Oct. 8th), but in this photo they are still about 3 weeks, and lots of frustration, from being finished. I've never had a post take 5 parts to tell, but I don't think Blogger supports that many photos in one post, and I don't have the patience to sit and upload photos and add narrative for that long in one sitting.

Continue reading:
Part 1
Part 2
Part 3
Part 5

Wednesday, October 12, 2011

Concrete Counters Part 3

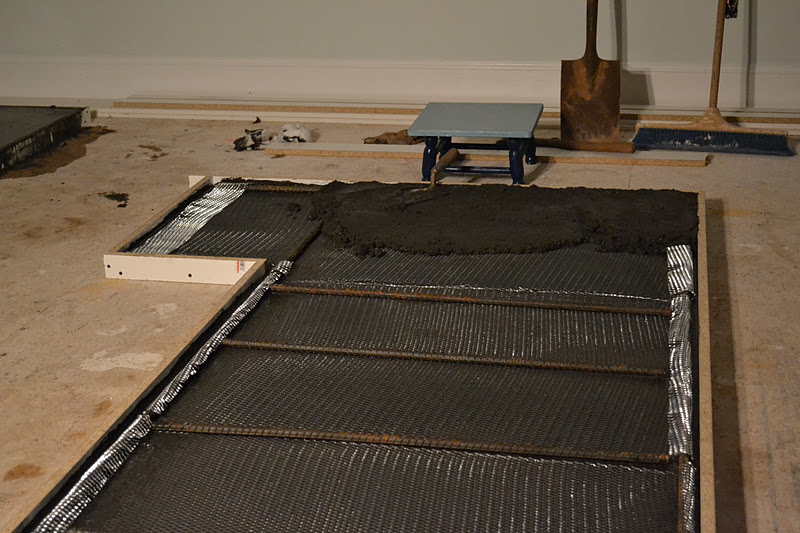
When we last left off, Matt and I had assembled the forms that the concrete will be poured into. The next step is to make the metal "skeleton" that will give the concrete more strength. Most people either lay metal mesh OR rebar, but we did both. We especially needed the support on the skinny part of the counter that holds the sink.

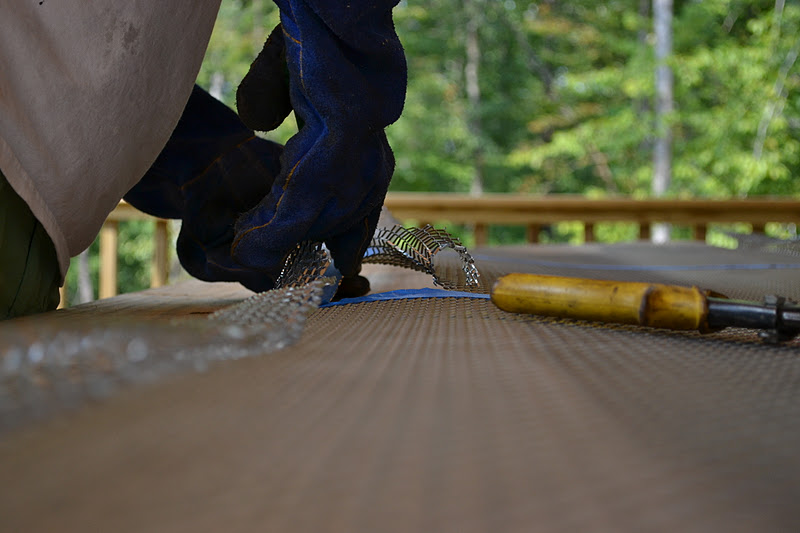
We measured the where the sink hole goes and used painters tape as a guide. The gloves protected my hands because this stuff is sharp!


Matt is bending the rebar. This will make more sense later. His tractor implement has some holes that he thread the rebar through in order to give him the leverage to bend the rebar where he wanted.


We're making a rectangle in case you couldn't tell. This piece will lay inside the "bar" countertop.


It was too wide the first time, so he had to make some adjustments.


This wrapped up that afternoon. Making the metal forms took way longer than we thought it would (doesn't it always?).

The next day (or some other day. it's been so long I can't remember), we arrived to find this:


You may have seen this on facebook about 5 weeks ago. That puts this time frame in perspective. Yes, it took me this long to blog about it.


I'm not really a snake person, but this gal/guy is kinda beautiful. Matt's friend, Zach, brought us two black rat snakes to help with our mouse problem. As far as we know, we don't have many snakes native to our land. I know there is at least one black racer, but he needed some help.

Not sure if they aren't doing their job, or they are still strongly out-numbered, but we saw a mouse just a few days ago (on 10/9/11). Lucy chased it, but it hid in Matt's car. No idea if it is still in there. I hope not.

The concrete pigment was mixed at half strength. So instead of one box of pigment for each bag of concrete, we needed HALF a box of pigment for each bag of concrete. Instead of eyeballing it, we used our postal scale (Matt had this for some auto shop work and we also use it has a kitchen scale). Since we were doing many batches, we wanted the color to be consistent.


In it goes into the mixer.


Adding the water.


Our first fresh batch.


We're only filling the forms half way up, then laying in the metal form before adding the rest.


I'm using a hammer/mallet to vibrate the concrete. This helps the air bubbles move to the top and pop. When concrete jiggles, the watery part flows around all the larger pieces of gravel. It's possible to rent a concrete vibrator, but I don't think that we could use it with the counters sitting on the ground. They would have to be placed up on a shop table or something.

So, what the other bloggers did was use an electric sander (without the sanding pads) on the edges to shake the bubbles loose. Another suggestion was to use a mallet or hammer and just keep hitting/tapping the sides. I did both sander and hammer, but found that the hammer seemed to be working better. I whacked that thing thousands of times. Rapidly.

I could see the air bubbles coming to the surface and popping. It was really hard work!


This is called screeding the concrete. You use any flat board and wiggle it across the surface to help level and smooth the concrete. Since this countertop is a cast mold, the side that is on the bottom will be the top of the counter and the surface that you see now will be the underside.


Now all we have left to do is wait for it to cure in about a week.


This one is already starting to set up.


Continue reading:
Part 1
Part 2
Part 4
Part 5

Friday, September 30, 2011

IKEA Flooring

When it came to flooring, we would have loved to have been able to afford hardwoods, but that just wasn't going to happen. And it wouldn't have been a good splurge since we aren't going to live in it for years and years (fingers-crossed). And wall-to-wall carpeting was just NOT an option in my book.

This lead us quickly to laminate hardwood. Not the really nice stuff either, which is still $3/sqft. We needed something around $1/sqft. That's hard to come by. Lowes has an aisle of laminate and as you walk down it you pass the $3/sqft (which looks really really good!), then you pass the $2/sqft (starting to look not-real), then you get to the $1/sqft stuff that they hide at the end of the aisle out of embarrassment. By itself, it really didn't look THAT bad (not for $1 anyway). It was fine.

Then, I took Matt to our local IKEA for his first visit (yes, we had a "date" to IKEA, complete with a coupon for a free dinner!). Our goal was to pick out some indoor lighting (mostly kitchen). We also happened to notice the laminate floors they had in their showroom. It was Antique Effect and it was installed in a mock-living room. It looked way better than what Lowes had. And it was still around $1/sqft. I was sold.


I love how the wood image (laminate is a picture of wood printed on to a composite material) is a wide 6 inch plank instead of two 3 inch planks printed on one piece.

We didn't buy it that day. I came back by myself for some crazy reason. It would have taken forever to plan a time when Matt could go back. I had taken measurements of our house and did the math to figure out how many boxes of flooring I needed (28, but I bought two extras just in case). I also took measurements to make sure I could fit them all in my jeep's cargo area with the seats folded down.

I went straight to the IKEA warehouse, by-passing all the showroom stuff. I grabbed a cart and started loaded boxes onto it. Holy crap, these are heavy! The packages aren't even that big. I had my cart and started loaded and quickly realized not only can I not load all 30 by myself, but they won't fit in one cart. And I can't push the cart with that much weight because of the poorly engineered wheel design.

Thankfully, a worker came to help me and loaded the remaining 20 boxes and pushed the heaviest cart to the check out and left me like this:


One cart weighing over 300 lbs, and the other weighing over 600 lbs. I had to pull them along, and tell people to watch out as they rolled to the left and right uncontrollably. Oh, and the rolls of white stuff are foam sheets that go under the flooring to help with leveling and sound absorbing. Our total for flooring was just over $1,000. Sounds like a lot, so I can't even imaging how much a full sized house with hardwoods would be (upwards of $10,000 I would guess).

IKEA has a loading zone, so I didn't have to load them all by myself. But driving my Jeep home made me nervous. Stopping at red lights was interesting. I felt like I was driving a semi. I had to be very careful and really pushed some yellow lights because I just couldn't stop in time without 1000 lbs slamming into my dash and me (that kinda happened once).

Now, they are sitting in our garage waiting until after the subs come back to install everything (lights, faucets, etc.). We are waiting until after they are done to install the floors so they don't get scratched up.

*Update: check out the finished floors here and here*

LinkWithin

Related Posts Plugin for WordPress, Blogger...