Friday, February 25, 2011

30 Before 30 List

A while ago, the trend on some blogs was to write a 30 Before 30 list. That is, 30 things you want to do before you turn 30. And because today is my 28th birthday, I thought it would be a good day to post my list. It is supposed to be a list of things you've never done before as a challenge to yourself. I had several character shaping items on the list(like "be less critical), but those aren't really measurable, and it's not something I can say "Ok, done! Check that off my list." They're more of a constant lifelong change. I also took off things that are totally unrealistic given I only have 2 years to do them. Things that time or money would just not allow, like lots of big exotic trips. Those destinations will definitely go on my "40 Before 40" list, if I write one.

I also never thought I'd be one of those people who has a hard time dealing with their milestone birthdays. Probably because the only ones I've had are turning 16 and 21, during a time when I couldn't wait to get older! But that's how it goes...

Our society tells us our 20's are the best years of our life. Teens rush to get there, and nobody is ready to leave them. For the first time, I feel year 30 knocking on my door. It hit me recently that it's just around the corner and I haven't done the things I thought I would have done and I'm not the person I thought I would be. For my whole life 25 was cool, but 30 was old. Now I'm almost there, so does that make me old? I guess it's all about perspective. Everyone out there reading this who is over 30 is probably rolling their eyes at me saying "Get over it. 30 is not old!" When you're in your 20's, and you're talking about yourself, it is old. Whatever milestone year is ahead of you, how do you feel about turning that age?

I could go on and on, but I'll wait 2 more years before I have a complete meltdown. So here's my list:

1. Move to our land

2. Get a dog

3. Learn everything about my DSLR

4. Learn everything about Photoshop

5. Plan meals every Monday

6. Eat less processed foods

7. Read my Bible daily (or at least regularly)

8. Go on a mission trip

9. Own fewer clothes and be happy about it

10. Travel someplace far away with my husband

11. Have a workout routine

12. Run a 5k

13. Have a baby

14. Pay off Volkswagon

15. See a Broadway show

16. Have a household budget and stick to it

17. Eat organic meat and dairy products

18. Donate blood

19. Help more random strangers

20. Have an organic vegetable garden

21. Tour the Great Smokey Mountains

22. Build a piece of furniture by myself

23. Simplify Christmas

24. Drive across the country

25. Take a dance class

26. Landscape our yard

27. Learn how to sew…for real

28. Get good at driving a manual transmission

29. Learn to shoot a shotgun

30. Earn money from my hobbies

*I reserve the right to make any changes I want to this list.

Wednesday, February 23, 2011

Santa Fe Chicken Bread Bowls

This recipe is super easy. Like, you don't have to be a good cook to make this. It's almost just dumping things in the pot. I know the ingredients list is long and looks intimidating, but it's really simple. It's warm and hardy, kinda like chili, and great for a cold night. It also great as leftovers. You can customize it to your family's tastes making it spicy or mild(depending on the enchilada sauce and taco seasoning chosen), or low fat(with fat free sour cream).


It's a Pillbury recipe, which you can find here. I don't think I use the two cans of dough though. That's a lot of bread. Divided into three balls, the bread bowls are small, but you can always refill them with seconds, or just serve the soup in a bowl with bread on the side(whatever bread you have on hand).

INGREDIENTS
2 (11-oz.) cans Pillsbury® Refrigerated Crusty French Loaf
1 tablespoon olive or vegetable oil
2 boneless skinless chicken breast halves, cut into 1/2-inch pieces
1 red bell pepper, chopped
1/4 cup chopped red onion
1 (16-oz.) can chili beans, drained
1 (11-oz.) can Green Giant® Super Sweet Yellow and White Corn, drained
1 (10-oz.) can Old El Paso® Red Enchilada Sauce
3/4 cup sour cream
1/2 cup ketchup
1 (1-oz.) pkg. Old El Paso® Taco Seasoning Mix
1 tablespoon dried parsley flakes
1 teaspoon dried basil leaves
2 oz. (1/2 cup) shredded Cheddar cheese, if desired

DIRECTIONS

1. Heat oven to 350°F. Spray cookie sheet with nonstick cooking spray. Remove dough from cans. Cut each loaf into 3 pieces; shape each into ball, placing seam at bottom so dough is smooth on top. Place dough balls, seam side down, on sprayed cookie sheet. Bake at 350°F. for 22 to 26 minutes or until golden brown.

2. Meanwhile, heat oil in large saucepan over medium-high heat until hot. Add chicken, bell pepper and onion; cook 5 to 7 minutes or until chicken is no longer pink in center, stirring occasionally.

3. Add all remaining ingredients except cheese; mix well. Bring to a boil. Reduce heat to medium-low; simmer 7 minutes or until thoroughly heated, stirring occasionally.

4.
With sharp knife, cut small portion off top of each loaf. Lightly press center of bread down to form bowls. Place each bread bowl on individual serving plate. Spoon about 1 cup chicken mixture into each. Sprinkle evenly with cheese. Place top of each bread bowl next to filled bread bowl.

Friday, February 18, 2011

Mid-Century Modern Desk Chair

Part of my planning for moving to our apartment, is having a furniture plan. I've been thinking through what furniture we are taking and what furniture we are changing and what furniture we are saving or getting rid of.

Since we basically will only have two rooms(living/kitchen and a bedroom), our office will be a corner in the living room. I'm kinda looking forward to this for two reasons.

1. When Matt is on the internet, he won't disappear into the back of the house.

2. It will finally motivate me to organize our desk and office supplies and keep them that way because I'll have to look at them all the time.

Our current desk is embarrassing to show you. Matt bought it in college for the large table top area. My main problem with it is that it has NO storage! No drawers! No NOTHING! Matt added some shelves himself, but they don't function very well. It almost goes without saying...THE DESK ISN'T COMING WITH US!!!! It's huge! We do not have that luxury of space to spend on an office area. And it's ugly! And completely non-functional for our needs.


I have cute white desk from my childhood that we will be using. It doesn't have as much space on top, but Matt doesn't use the desktop except as a place to collect junk and papers. If he needs space to spread out something like our houseplans, we have the kitchen counter AND the kitchen table.

Now on to the chair issue...

Matt was fine with the idea of using a different desk. And in MY head it was obvious that if we are getting rid of the giant ugly desk, we are also getting rid of the giant ugly chair. This was not so obvious to Matt. How could he think I was going to put this chair with my cute white desk?


That was not going to happen. That would mean from every area of the room, whether it be the kitchen, the dining area, or the couch, you would see this:


I envisioned something more like this:
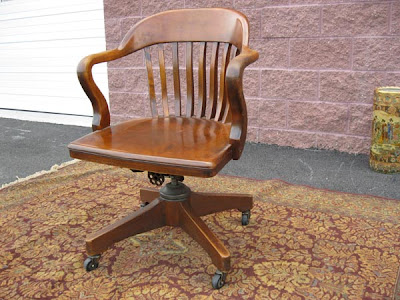


Except not $400 from Pottery Barn. Maybe more like $50 from a flea market or Craigslist.

So, I started searching Craigslist to see what was out there and to check out the prices. Found a few wooden options, but then I came across this ad.


And the aluminum one caught my eye. I sent it to Matt at work and his response was "It's freakin' sweet. I want it!" I've never actually heard him use the phase "sweet", but it was no surprise that he would love it being a metal worker himself. So I called the consignment shop where it was and made plans to go see it the next day.

I also browsed around the internet and ebay doing a little research on this baby. I saw many others in great condition listed from $150-$400. It's made by Goodform(you can google "goodform aluminum chair" and check out images...if you want). They make a dining chair version which is called the "navy chair" because it was made for naval ships because of it's lightweight and durability.


You might recognize this chair. I know I did. The originals, along with lots of remakes, are gaining popularity and making lots of appearances in decor magazines lately. I've seen them countless times in magazines you wouldn't think would have a chair like this, such as Better Homes and Gardens and Country Living. They are usually paired with a rustic farmhouse table. It's all about blending styles together.


Hard to see them, but they're there. I couldn't find any better pictures right now. Here's one with different industrial chairs(can be purchase from pottery barn or sundance).


Ahhh. I just love that dining room.

Ok, let's get back on subject. We bought the chair and I set out to buying supplies to recover the seat.

1. one yard of vinyl from Mary Jo's Cloth Store in Gastonia(a yard was way too much by the way) $8
2. one yard of 1/4 in' foam to add some padding to the metal seat $3
3. spray adhesive(I used Super 77) $5
4. aluminum polish(from a car parts store) $6

And there are leftovers of everything but foam for another project.

Close-up of chair before:


Because the seat is "butt-shaped", I couldn't cover it the way I usually do. And I couldn't use staples like you normally would attach new fabric. I decided to use spray adhesive so that you could still see the butt shape, rather than having the fabric stretched tightly over the top. I added the foam to give it a little padding, since there was none.

I'll try and talk you through it, but I did a really bad job of documenting my work.

First, I flipped the chair upside down and unscrewed the nuts that held on the seat. I used needle-nose pliers to get into the hard to reach places. Once the seat came off, I needed to clean the chair. Under the seat had a lot of red/orange dust collected, which I can only assume was rust or decomposing adhesive and dirt, or a combo of all three. I used the vacuum attachment to clean all this up. It was a lot. Especially under the seat liner that immediately crumbled when I touched it. I ripped it off to expose the metal underneath to make sure it was all clean.

I polished the frame using the aluminum polish and a rag. It didn't make a big difference. It basically just cleaned the metal a little. It's not really any shinier and all the scratches are still very apparent.


I took the seat outside and sprayed it with adhesive. The directions say to wait at least 30 sec for it to get sticky. Then I laid the foam on top and smoothed it out. Once moved back inside, I trimmed the foam to fit around the seat.


Next, it was time to spray the vinyl and attach it to the seat. Because the seat is concave, getting it wrinkle free was impossible without heating up and stretching out the vinyl, so I just did my best to spread out the wrinkles(shown in the after photo below).

Then I trimmed it and sprayed the edges with glue. Folding the sticky corners was also tricky and they don't match each other perfectly. Once it was attached, I placed it back on the chair, flipped the chair over again, and reattached the brackets that hold it on(sorry, no pictures).

I did make one mistake with my trimming. I didn't leave a flap to fold over to hide the foam. There is a raw edge where the seat meets the arm of the chair. It will probably always bother me, but I think once it's in the room and being use, no one will notice it(shown in the photo below).

Over all, I'm very pleased with how it came out.


Close-up of a corner


Close-up of wrinkles


Close-up of my cutting mistake


Total money spent: $72 (with leftover supplies, so you almost can't count some of that)

Once Matt fixes the hydraulic thingamajiger on his old chair, we will sell it on Craigslist, so that will help with the cost even more. It won't pay for the whole thing but that's ok.

Tuesday, February 8, 2011

Goodwill Finds

I think my neighborhood Goodwill knows me by name. Or at least one or two of the employees. I used to go almost weekly. But I'm really trying to cut back. Or I'll run out of room at my house.


A lot of people are anti-Goodwill because of the stigma attached to it. I used to be that way. The Goodwill I used to live near was junky and trashy and old. It was pretty difficult to find treasures there. When picking a Goodwill to shop at, think about the surrounding area. The "feeder neighborhoods" as I like to call it. Those are the people who are donating the stuff. Fancy area= fancy stuff. I don't live in a fancy area, but there are enough fancy developments near the lake that feed this Goodwill(at least I think so. This is a total hypothesis.)

Most of the stuff I own falls into one of these tree categories: hand-me-down(mostly furniture), wedding present, thrift store/2nd hand find. I don't shop at retail very often. It's just so darn expensive. And I like to tell myself that it's the "green" thing to do(which it is), but my main motivation is money and the fun of it. I love thrifting! My mom and I go thrifting everywhere we go. My friends and I go thrifting everywhere we go(although I'm usually the only one who buys stuff because we are all poor and I have no self control). Pretty much, if you don't like thrifting, we can't be friends. It's that important. Also, did you know thrifting is not a word? My spell check has underlined it like 6 times. It really should be a word. Someone call Webster.

On to the good stuff!

This is what I got yesterday:

Bowl from Crate and Barrel: $1


6 off white dinner plates: $.50 each
I think it would be neat to have a variety of patterned plates all in the same color(to tie them together). And it's easy to find odd dishes at thrift stores. You can go wrong with 6 for $3 plates!

Kitchen walls: before, during, after

Way back when we moved into this house, every room was covered in wallpaper. Really, really ugly outdated wallpaper. The kitchen cabinets were original dark stained wood. Read about that makeover here. The den had paneling. And all the trim was dark stained wood. And there was a lot of it.

This was before we moved in and there were still a lot of belongings left behind. If you click to enlarge the photo, you can see the ugly country wallpaper, a weird shelf thing, and the original microwave that died shortly after we moved in.


We painted the paneling, the kitchen walls, and replaced the oven and oven hood(removed the old microwave). I picked the dark pink(raspberry) I think because the warm tones would go well with the dark stained cabinets. I was also tired of painting the rest of the house beige and tan for resale(we are renting from my in-laws and they will either rent it or sell it after we move out). I wanted something bold. And this is how it stayed for a long time. I'm really not sure why I took this picture at night. It doesn't really make for a fair comparison. I wish you could see how much more natural light is in the after, but you can't see it here to compare.


Oh wait! Here we go. A picture during the daylight. After the kitchen trim and cabinets(read about that here) had been painted. You can also see the tester spot I painted with the new color(next to the light switch). I also took down the shelf and extra trim. It makes the room more opened. The shelf wasn't that bad, but it looks more updated and modern without it.


And the after. It's so much brighter! And looks great with the "new" white cabinets. It looks so fresh!


Another angle with more true to life natural lighting(no lamps on).


And on to the laundry room...

before...


during...


after...


The next phase of the total makeover is to paint all the trim and cabinets in this room. This all started when our house got broken into last summer.

Let's see if you can follow this:

We had to get a new door, which was white, and I needed to paint the new trim, but I didn't have(or want) the paint that's currently on the trim. Which means painting all the trim in the laundry room AND kitchen AND the den, since it all flows together.

I thought, if I paint the kitchen trim, I really need to paint the cabinets too. After that was done, onto the rest of the trim. It took me almost 6 months to finally get around to painting all the trim in the kitchen and den. Then I wanted to change the wall color(which is so much more fun than trim).

That brings us to today. The only part I have left to do, was the only part that needed to be done: the laundry room trim and new door frame. It still hasn't been painted.

Monday, February 7, 2011

Free Couple Checkup

This month, my church is doing a series on marriage called "I Do/I Don't". As an introduction, they are offering a free couples checkup online to see where you are in relation to your spouse and help open the lines of communication.

Matt and I took it and it was very interesting how accurate it was after just answering a few questions. It really hit the nail on the head and identified the problem areas as well as our strengths. The results are graphed and grouped into key relationship areas. It telsl you where you and your spouse are in agreement and where you might need to discuss further. Some of our areas of highest agreement where financial management and spiritual beliefs.

One of our lowest was conflict resolution.

(And satisfaction of leisure activities because Matt doesn't have time for any, which appears to bother me more than him.)

We were already well aware of this. A lot of it has to do with the fact that we are both "typical" first born children. We both can be opinionated, stubborn, and controlling. Needless to say, we can butt heads a lot. Over really stupid things. I'd really like to stop that.

It was really nice to spend the evening talking about our relationship(and all the guys out there reading are gagging now) when all the "issues" were identified and printed right there in front of us.

At the end of the checkup, there is a SCOPE Personality Scale. Matt was identified as: social, flexible, organized, uncooperative/controlling, and emotionally steady. That's a pretty good balance.

I, on the other hand, am antisocial, closed off, organized, uncooperative/controlling, and emotionally unsteady. Awesome! Matt is a LUCKY guy. Yeah, I'm not perfect. I'm a work...in progress. (haha was that too corny? sorry)

If you are interested in taking the couple checkup for yourself, go to our church website. It has the website listed with the voucher code for the free assessment(it's normally $20). The format of the questions is "rate on a scale of strongly agree to strongly disagree". It takes about 15 min for each of you. The questions are completely non-religious(if that is a concern). Offer expires Feb 14. Hey, and if you live in the area, now would be a great time to check out our church during our marriage series!

Friday, February 4, 2011

House Update: A Roof

We had to wait two week for ice and rain to clean up, but the roofers were finally able to put our roof on, so it's totally weather proof now. We are almost officially "dried in". If you don't know what that means, basically it just means you would stay dry in the house during a hurricane(no weather coming in or damaging the house).


The only thing that hasn't been done is our garage door. We bought it a year ago off of craigslist. The style we got is the faux carriage door(white with fake black hinges on the sides). They normally retail for over $1000. We got ours for $400. It's been sitting under a tarp on the ground for a year, so I hope it's still ok. Know anyone who installs garage doors? The electric kind? We'll have to install insulation panel on the inside of the door, especially since it's right under our living area. We want to keep the cold out as much as possible.

There is one little mistake we have to correct. Matt and I had a mis-communication about the kitchen window. I had discussed at length with the framer what window sizes I wanted and I thought Matt was around for part of that(maybe he was and he forgot. We really don't know). Point is, we(as the contractors) were ordering the windows ourselves, and Matt didn't know I wanted the single kitchen window to be wider than the other(since there was only one). All our windows are 32 in. wide and the kitchen sink window was supposed to be 36 in. The 32 in. looks SOOO tiny and narrow. I just can't see standing at the sink washing dishes looking out that tiny thing. It's also the only window on the back wall, so it feels really closed in.


After we analyzed it, we decided that if we were going to go to the trouble to change it and reframe the window opening and cut out some siding for just 4 more inches...why not make it even wider? Whatever is the next size up. Either 40, 42, or 44 in. I think we'll be really glad we did it in the long run. I just didn't want to lose cabinet space with a double window(which would be two 32 in. windows). We haven't done anything yet. Maybe our framer will do it for us. He still has to come back to finish a few things. The downstairs bathroom needs to be framed in and the pocket door walls separating the bedrooms need to be framed as well. We keep trying to schedule a walk-through to discuss these things with our framer, but all of our schedules keep getting in the way. He's working on other jobs far away, so it's hard to get over to Stanley. I can't wait until we move on to the next step.

Italian Sausage and Zucchini Penne

This is one of our favorite meals! I'm not one to repeat meals very frequently(I get tired of food easy), but to say we eat this several times a month is a lot. I probably make it more frequently than anything else. It's easy, healthy, and we love it. You've got your lean protein(turkey sausage), whole grains, and vegetables all in one. And I LOVE one dish meals. Fewer dishes!

It looks similar to this(not my photo):


Italian “turkey” Sausage and Ziti Skillet Dinner

1/2 lb. Italian turkey sausage, casings removed

1 cup diced onion

1 cup diced bell peppers(I buy frozen bag of mixed peppers from Harris Teeter. Sooo much cheaper than fresh)

1 can Campbell's Healthy Request Tomato Soup

1 1/2 cans of water

2/3 of a box of whole grain pasta

2 medium zucchini, sliced

1 Tbsp dried basil

½ tsp pepper

¼ - ½ cup grated parmesan cheese

1. Cook sausage, onion, and peppers over med-high heat 8 min or until sausage is no longer pink and veggies are tender.

2. Stir in soup and water, bring to boil, stirring until smooth.

3. Stir in pasta and zucchini, cover, reduce heat and simmer 25 min or until pasta is cooked, stirring occasionally so pasta cooks evenly. Add more water if needed.

4. Remove from heat and stir in basil, pepper, and cheese.

Shrimp and Feta Fettucine

I've said before that I don't take pictures while I cook. So I found one online that resembles the dish the closest. I got this recipe from a friend and it's a great go to for when you haven't been to the store in a while. I keep frozen shrimp, pasta, feta, and canned tomatoes in the kitchen at all times.


Did you know that the "fresh" seafood sold at grocery stores has actually been frozen and is not fresh at all? They thaw it themselves and it sits in the case all day at the store. Then you bring it home and might not use it for a day or two. The quality will be better if you buy it still frozen and thaw it yourself. You can buy frozen shrimp a million different ways. Of course you want de-shelled and de-veined(since they are frozen, that part would be difficult to do yourself). I buy shrimp tail-off because in an entree, I hate having to eat around the tail. This is not finger food.

You can vary this recipe to fit your needs. It calls for a can of petit diced tomatoes, but if you plan ahead and buy a fresh one, it's much better. This sauce is very light and "tomatoey", but not very "tomato saucey". If you want it saucier, add a small can of tomato sauce. I've also made it before using a can of spaghetti sauce when I didn't have tomatoes. And the seasoning is already in there.

Shrimp and Feta Fettuccine

1 lb. shrimp

¾ tsp crushed red pepper flakes

1-3 oz crumbled feta cheese

½ tsp crushed garlic

14.5 oz can petit diced tomatoes

¾ tsp. basil

½ tsp. oregano

¼ tsp. salt

¼ tsp pepper

¼ cup dry white wine/white cooking wine

Whole Grain Fettuccine

1. Saute shrimp and red pepper flakes in olive oil or butter(Use butter if shrimp are wet or frozen. Hot oil and water do not mix.)

2. Arrange cooked shrimp in small/medium baking dish. Sprinkle with feta cheese and set aside.

3. Add remaining olive oil to skillet and sauté garlic over low heat. Add tomatoes with juice and cook 1 min. Stir in wine, basil, oregano, salt and pepper. Simmer uncovered 10 min.

4. Spoon mixture over shrimp and bake uncovered at 400 degrees for 10 min.

Serve over fettuccine(or something similar).

LinkWithin

Related Posts Plugin for WordPress, Blogger...